https://api.social-api.ai/mcp
Web & Desktop
Prerequisites
- A SocialAPI.AI account with at least one connected social account
- Any ChatGPT plan (Apps are supported on all plans, including Free, Plus, Pro, Business, Enterprise, and Education)
1. Enable Developer Mode
Go to Settings → Apps & Connectors → Advanced settings and toggle Developer Mode on.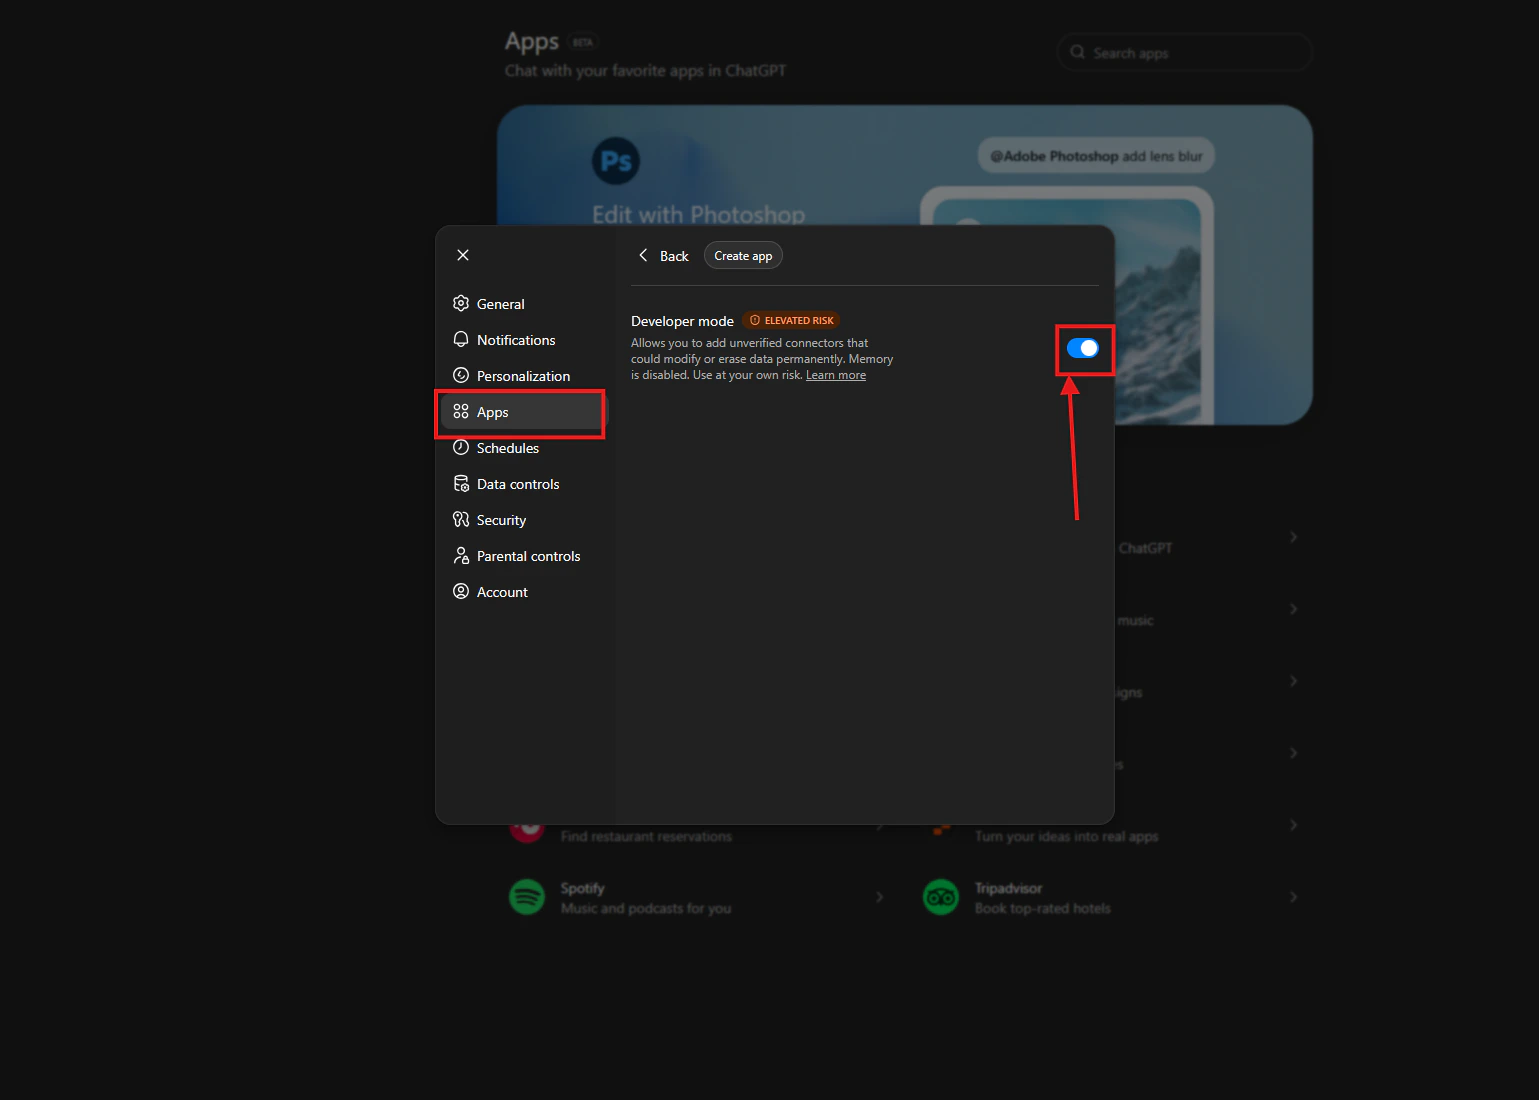
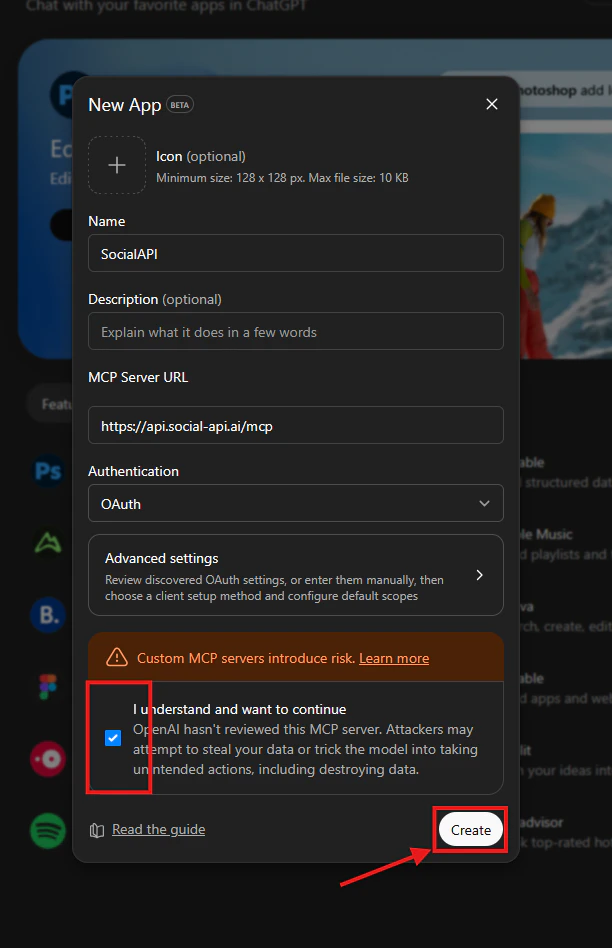
2. Create a connector
Go to Settings → Connectors → Create and fill in:- Name:
SocialAPI.AI - Description:
Manage social media accounts, posts, comments, DMs, reviews, and mentions - Connector URL:
https://api.social-api.ai/mcp
3. Authorize with your account
When you first use a SocialAPI.AI tool, ChatGPT initiates an OAuth 2.1 flow with PKCE. A browser window opens to the SocialAPI.AI authorization page. Log in and click Authorize.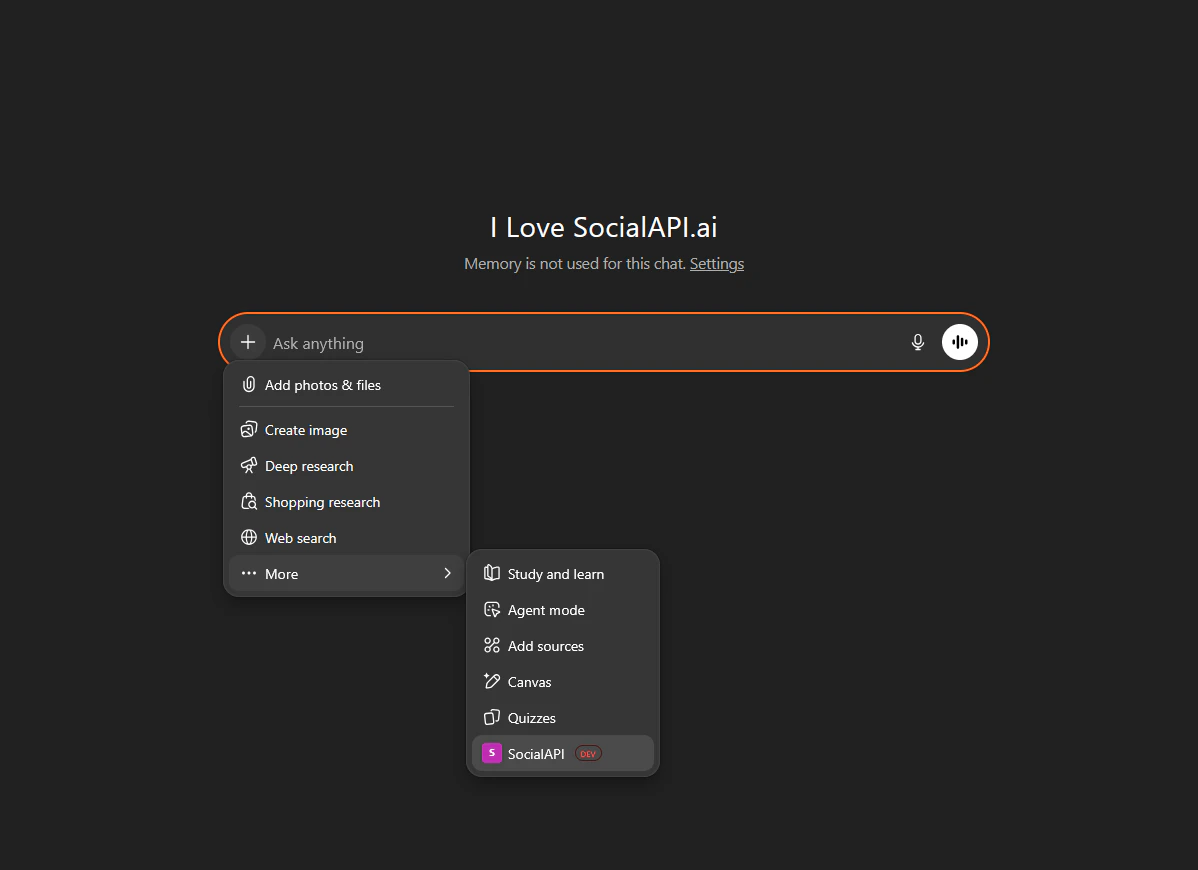
ChatGPT supports OAuth 2.1 with PKCE and Dynamic Client Registration. It auto-discovers your authorization server via
/.well-known/oauth-protected-resource - no manual auth configuration is needed.4. Enable in a conversation
Open a new conversation, click the + button near the message composer, select More, and toggle your SocialAPI.AI connector on.Mobile (iOS / Android)
Connectors created on ChatGPT web are available on the ChatGPT mobile apps (iOS and Android). You cannot create new connectors from the mobile app - set them up on the web first.- Add SocialAPI.AI as a connector on chatgpt.com (see Web & Desktop above)
- Open the ChatGPT mobile app - the connector is already available
- Enable it in a conversation via the + menu